Steps to Installing WP E-Signature
Before installing WP E-Signature, you should review our server requirements here.
If you’re on version 1.9.4.1 or earlier, we recommend updating to the latest version. If updating isn’t possible right now, you can find alternative instructions at the bottom section of this page.
1. Download and install WP E-Signature plugins
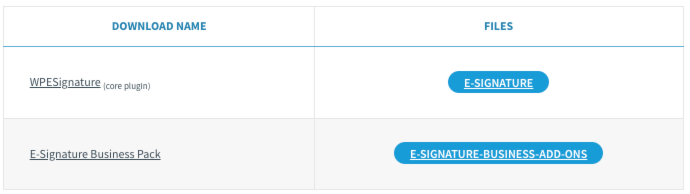
Log in to your ApproveMe.com profile.
Download WP E-Signature and WP E-Signature add-ons from the My Downloads screen.

Next, log in to your WordPress backend, visit the Plugins tab > Add New > Upload.
Choose the WP E-Signature zip file download > Install Now > Activate.
Then, you're walked through a setup tutorial where you save your settings (more on this below).
Repeat these steps to install the WP E-Signature add-ons plugin.
2. Save your E-Signature settings
After activating WP E-Signature, an installation checklist will run a few tests to confirm your server meets the minimum requirements. Once the check passes, you will be guided through a few onboarding steps. You can complete these steps or skip them.
If you skipped onboarding, start by selecting E-Signature > Settings.
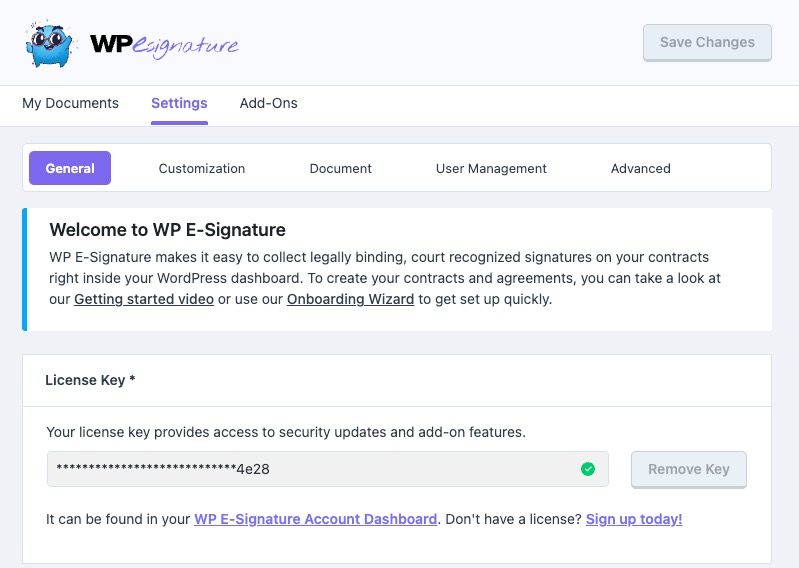
First, activate your WP E-Signature license key.
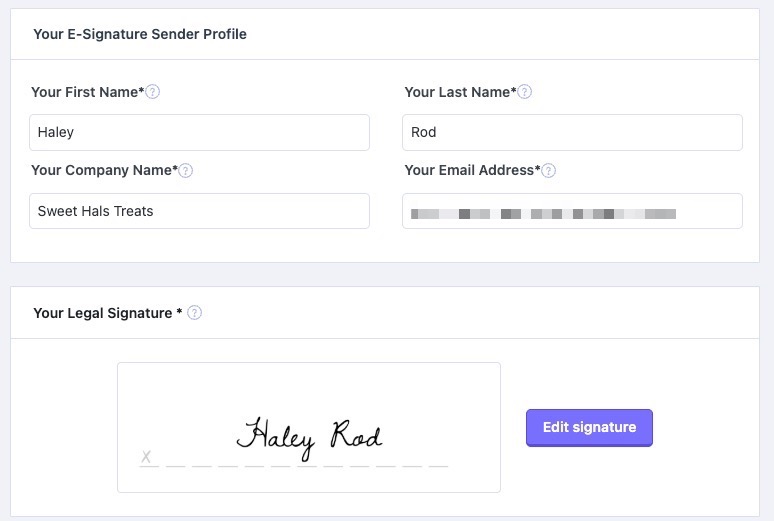
Then, scroll down further and fill in your user information, and save.
The information placed in these settings will appear for your user throughout WP E-Signature. Keep in mind that these settings can be adjusted and republished at any time.
Once your license is active on your WP site and your settings are saved, you can start creating and sending documents. 🎉
If you’re on version 1.9.4.1 or earlier, we recommend updating to the latest version. If updating isn’t possible right now, follow the steps below. 👇
1. Download and install WP E-Signature plugins
Log in to your ApproveMe.com profile.
Download WP E-Signature and WP E-Signature add-ons from the My Downloads screen.
Next, log in to your WordPress backend, visit the Plugins tab > Add New > Upload.
Choose the WP E-Signature zip file download > Install Now > Activate.
Then, you're walked through a setup tutorial where you save your settings (more on this below).
Repeat these steps to install the WP E-Signature add-ons plugin.
2. Save your E-Signature settings
Upon activating WP E-Signature, an installation checklist will run a few quick tests to make sure your server meets the minimum requirements.
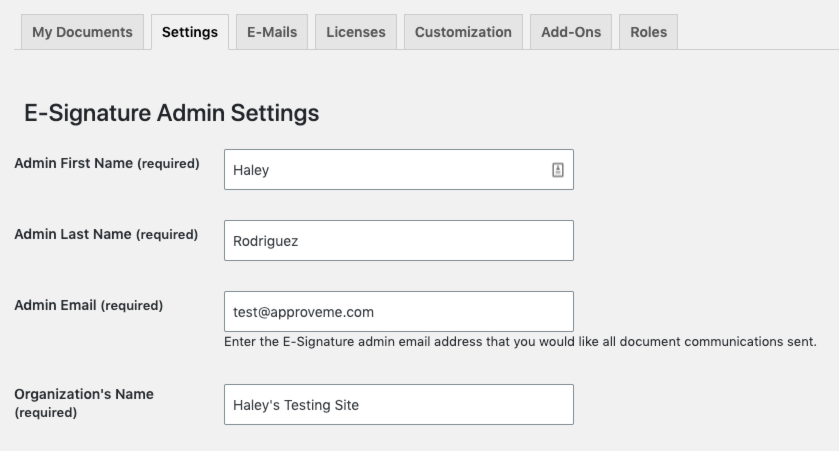
Once it's complete, start by selecting E-Signature > Settings, fill in all fields, and save.
The information placed in these settings will appear for your user throughout WP E-Signature. Keep in mind, these settings can be adjusted and republished at any time.
In order to proceed to the next tab to activate your license key, all fields must be filled in and published.
3. Activate your E-Signature license key
After you save your E-Signature settings, you’ll need to activate your WP E-Signature license key.
To do this, visit E-Signature > Licenses tab, paste in your license key, and select Activate License.
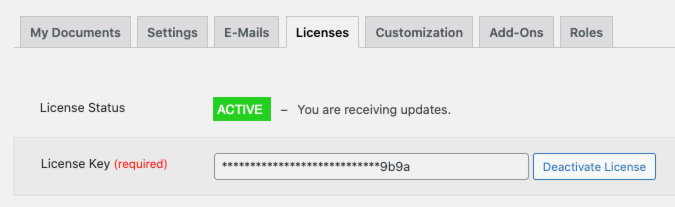
Once your license is active on your WP site, you can start creating and sending documents. 🎉