How to Allow Write Permissions for WP E-Signature Temp Directory
While WP E-Signature does not store your data or signed contracts in your FTP account, it does temporarily generate specific files related to your documents occasionally and on-demand. To do this, it requires that your “wp-content/plugins/e-signature/assets/temps” directory be writable.
Follow these steps to allow write permissions for the WP E-Signature temporary directory.
1. Create (or locate) your FTP credentials
You will need your Hostname (usually your web address) and your Username & Password (this can be setup with your web host).
2. Connect with Filezilla
Using Filezilla, connect your FTP client to your web server and then locate the file you want to CHMOD. (If you do not have Filezilla you can download it for free here!).
3. Enter your login credentials
Enter your login credentials and then navigate to the folder that is hosting your website (if you have questions about how to do this, you should contact your web host).
4. Select temps folder
Go to: the folders wp-content –> plugins –> e-signature –> assets and select the “temps” folder.

5. Choose file permissions
Right-click the file on your web server and choose the option “File Permissions”.

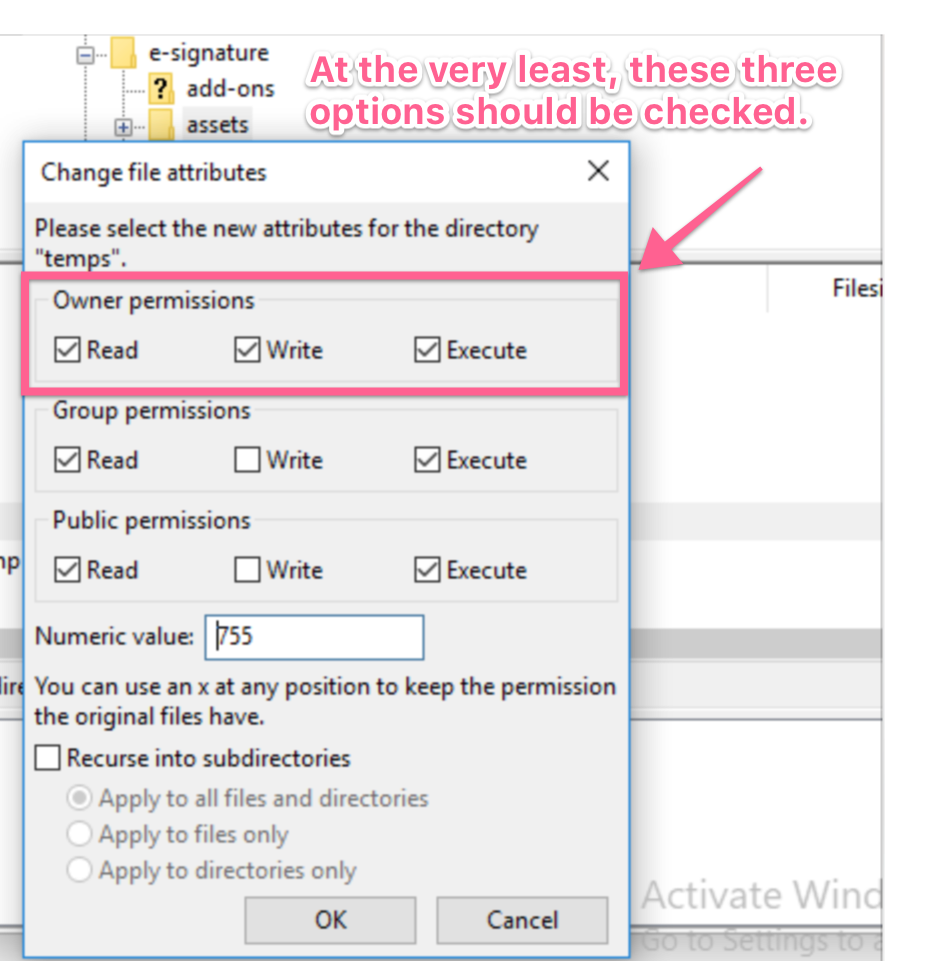
6. Enable permissions
After you select “File Permissions”, you will see a popup window. Be sure that at the very bare minimum, the “Owner Permissions” Read/Write/Execute are ALL checked.
7. Run install checklist
Click “OK”, go back, and run the WP E-Signature Install Checklist by deactivating and reactivating E-Signature.